As a music enthusiast, you may think that soundproofing and acoustic treatment are expensive. Well, that’s right in some aspects. But, soundproofing can also be possible on a low budget.
Yes, you heard right. There are several ways that exist for DIY soundproofing for home studios. Multiple DIY techniques exist to help you soundproof your recording studio on a low budget.
In this blog post, I will reveal all these techniques to soundproof home studios on a low budget.
So, are you ready to explore this soundproofing guide?
All right, let’s get started.
Read also,
Soundproofing: An Overview
Soundproofing can be divided into two parts.
- Blocking the sound: Blocking the sound refers to stopping the sound permanently at a point and preventing it from traveling ahead. Soundproofing is actually the term used for blocking sound. However, in this blog post, I will use it for both blocking and dampening the sound.
- Dampening the sound: Dampening the sound refers to dampening the amplitude of the sound wave at a certain point, which reduces the power of the sound wave to travel ahead. Acoustic treatment is often used as a means of dampening the sound.
What is Soundproofing?
So, in terms of this blog post, we can consider soundproofing means customizing a room to block the sound waves from traveling outside the room as well as dampening the sound to reduce reflection of the sound wave.
We use different methods to soundproof walls, floors, doors, and windows to trap and block the sound waves.
Why Do You Need to Soundproof Your Home Studio?
As a musician, podcaster, or recording engineer, you need a reflection-free and quiet environment to record and mix your audio projects.
When you mix your projects without soundproofing the room, the sound reflections mixed with the original sound can reduce the mixing quality.
That’s the importance of soundproofing.
So, an ideal home studio should be well soundproofed to absorb and dampen the sound waves and minimize reflection as well as block the sound from traveling outside the room.
Soundproofing vs. Sound Absorption

Soundproofing and sound absorption are two different aspects of acoustic treatment.
As discussed above, soundproofing blocks the sound from traveling outside the room, where sound absorption catches the sound waves and absorbs them to minimize the amplitude.
Sound absorption prevents echo and reverb due to the reflection of sound waves.
If your goal is to block external noise and internal sound traveling outside, soundproofing is necessary. If you want to minimize the echo and reverb in the room, you can use sound absorption methods like bass traps, soundproof curtains, etc.
We use both methods to make our room well acoustically treated.
Blocking vs. Dampening Noise

Practices that block the noise from traveling through the walls, windows, and doors are called noise blocking.
Dampening is actually part of noise-blocking, in which sound vibrations are reduced to a minimum level so that the room becomes acoustically treated.
Various methods are used to block and dampen the sound energy, such as using sound-absorbing blocks, soundproofing, curtains, and strips at the corners of doors and windows.
In professional methods, glass wool, sponge, and wooden structures block and dampen the sound traveling outside the room.
Common Soundproofing Materials
As we have discussed above, several DIY and professional methods can be used to soundproof a room.
Let us discuss some common and budget-friendly sound materials that you can use to soundproof your recording studio.
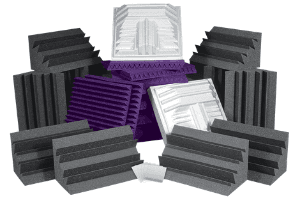
Acoustic Foam Panels: Home panels are used to stick on the walls, and when sound waves collide with the foaming material, they absorb the energy of the sound and dampen the sound. There are various sizes, qualities, and thicknesses of acoustic foams available in the market. You can check out some of them here.
Rubber strips: Rubber strips or weatherstripping are used on the sides of doors and windows to block outside noise and also prevent the inside sound from traveling outside the room. Rubber strips pack the sides of the doors and window panels just as shown in the figure.
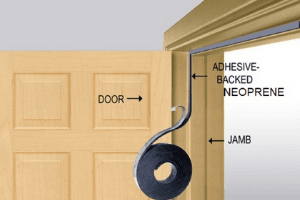
Check out the Best rubber strips or weather stripping here.
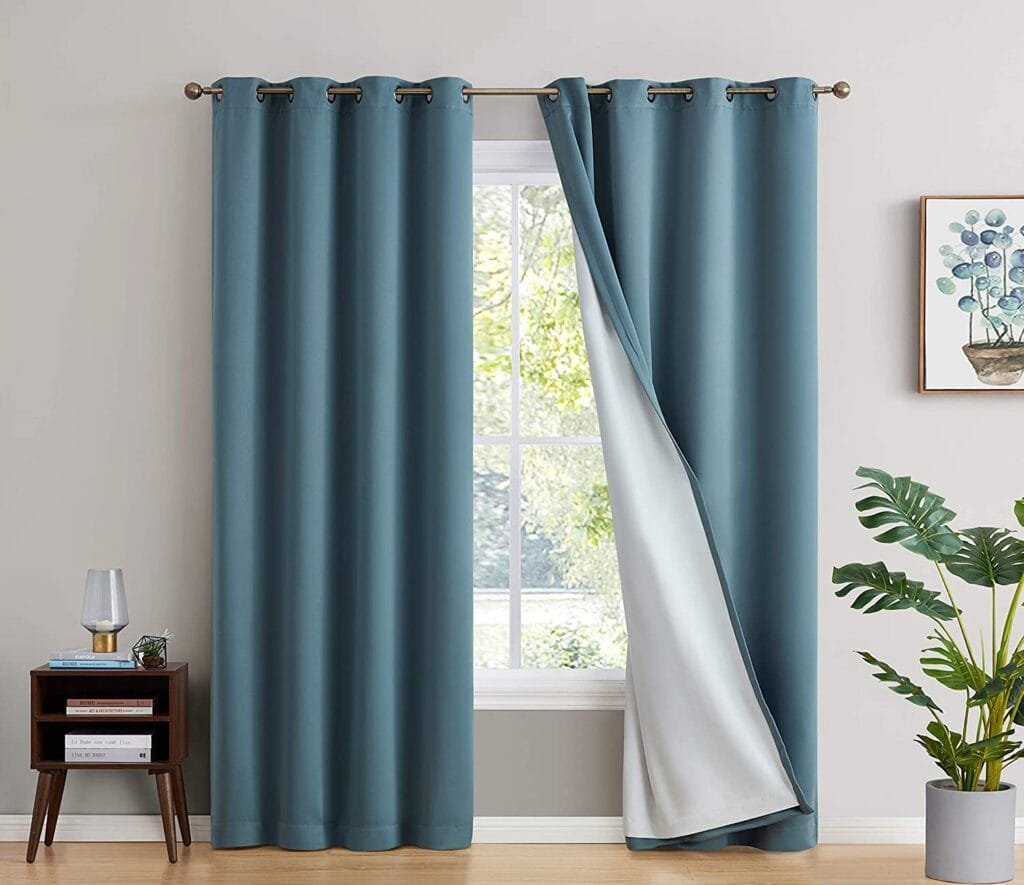
Soundproof Curtains: Heavy soundproof curtains are used to trap the mid and high-frequency sound and reduce the sound energy.
Carpets and Rugs: To reduce the sound reflections from the floor, heavy rugs and carpets are used.
Rugs and heavy carpets are very well at absorbing sound energy. If you use this solution in your home studio, you will see a noticeable change in the sound reflections.
These are some common and budget-friendly soundproofing methods you can use in your recording studio.
Now, let’s divide the components of a room, such as windows, doors, and walls, to discuss the soundproofing methods used for them.
First off,
Soundproofing Walls on Budget
Walls are the main component of a room that reflects the maximum amount of sound. The flat surface and paint used on the wall easily reflect the sound wave.
So, soundproofing the walls is the first step to building a soundproof room.
We can use heavy curtains and blankets on the wall that absorb the mid and higher-frequency sound waves and reduce the intensity.
We can also use wooden frames and other decorative materials on the walls that scatter the sound wave and prevent reflection.
In the professional solution, a wooden diffuser is used on the wall just behind the audio mixing table to scatter the sound waves. But if you don’t have the budget to buy the wooden diffuser, you can also use a heavy blanket on the wall, which definitely works around it.
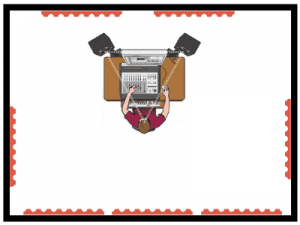
Also, don’t forget the corner of the walls, which increases the energy of sound waves by colliding the reflections with each other, as you can see in the image below.
If you can, build your own DIY Acoustic panels by using foam and thick fabric and stick them on the walls to reduce the sound reflection.
Otherwise, you can use the above-given solutions to soundproof your room.
Soundproofing Floors on a Budget

As we have discussed above, we can use rugs and carpets to reduce the sound reflections from the floor.
You should also use wooden furniture that is actually helpful and reduces the sound energy inside the room. Don’t use plastic and metal chairs and tables because they increase the sound reflection.
You can use wooden bookshelves that are actually useful in blocking the sound waves.
Use as much wooden furniture as you can that fills the room, and this helps in scattering the sound and reducing the reflections.
Rubber mats are very useful in reducing noise transmission. You can also use them in your recording studio.
When you are using furniture, don’t forget to use furniture pads, which are quite beautiful in the sound.
Soundproofing Doors and Windows on a Budget
Doors and Windows are the main sources of outside noise. The gaps between the doors and windows make them vulnerable to outside noise.
That’s why it’s essential to pack the doors and windows to reduce unwanted noise.
We can use weatherstripping made of rubber material, and it effectively works on soundproofing.
Door sweeps are also in trend. You can stick them below the bottom gaps of doors to prevent outside noise. Heavy curtains play the main role when it comes to blocking mid and high-frequency sounds going outside of doors and windows.
They effectively work on reducing the intensity of sound and preventing reflection.
Additional DIY Soundproofing Tips
Additionally, you should seal the gaps and cracks that exist on the doors, windows, and walls.
If the door and windows are made of thin plywood or metal, then you should use additional wooden mass on them to prevent the reflection.
Don’t keep the corners of the walls bare. Use DIY bass traps made of high-density sponge or wood to prevent the gathering of sound reflections in corners.
Professional Soundproofing Alternatives
Okay, above we have discussed DIY and budget soundproofing tips for recording studios.
Well, if you have a budget, you may go for professional soundproofing alternatives, such as,
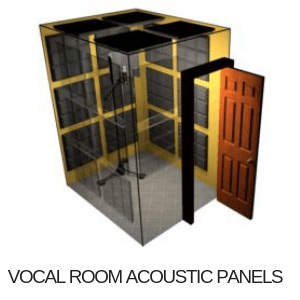
- Acoustic treatment panels
- Bass traps
- Diffusers and more.
FAQs
Are DIY soundproofing techniques as effective as professional ones?
No, they are effective, but not as much as professional soundproofing methods.
Suggest some affordable soundproofing materials.
High-density curtains, weatherstripping, and blankets are the most affordable materials for DIY soundproofing.
How to check if the DIY soundproofing works?
You can check by ear or using SPL meters.
Conclusion
When it comes to studio recording, soundproofing is an essential investment. Whether you use professional soundproofing techniques or DIY tricks, you must soundproof your control room to get the most out of your recording and mixing.
If you don’t treat your room, then you may get a mixture of outside noise and inside reflections, which can degrade your monitoring and mixing quality.
If you don’t have a large budget, then you can use DIY soundproofing methods and get rid of the noise and reflection problems.
So if you haven’t started soundproofing your Studio control room, then use these DIY soundproofing for home studios methods and let me know in the comments. How effective these are.
Read also,